
How to Organize a Small Apartment Kitchen in 2026
Table of Contents
- Start With a Purge and a Plan
- How to Maximize Counter Space in a Small Kitchen
- Small Kitchen Storage Ideas That Work in Rentals
- The Best Kitchen Organizers for Small Spaces
- Rental-Friendly Apartment Kitchen Organization: Non-Permanent Fixes
- Ergonomics and Workflow in a Micro-Kitchen
- Budget DIY vs. Premium Apartment Kitchen Organization
- Conclusion
- Frequently Asked Questions
Last Updated: September 16, 2026
Start With a Purge and a Plan
Learning how to organize small apartment kitchen spaces starts with subtraction, not shopping. Apartment kitchen organization works best when you remove what you don't use before you buy a single bin. Walk through your cabinets with a trash bag and a donation box, and pull anything you haven't touched in a year.
Here's the order that works:
- Empty one cabinet at a time onto the counter
- Sort into keep, donate, and toss piles
- Wipe the shelf, then put back only the keep pile
- Repeat for drawers, then the pantry
A common mistake is buying organizers first. You end up storing things you never use. Purge first, measure second, shop last. The U.S. Environmental Protection Agency's guidance on reducing household waste notes that reducing what you own is the most effective step before recycling or reusing.
How to Maximize Counter Space in a Small Kitchen
To maximize counter space in a small kitchen, move everything you can off the surface and up. The countertop footprint should hold only what you use daily: the coffee maker, the knife block, maybe a cutting board. Everything else gets a home elsewhere.
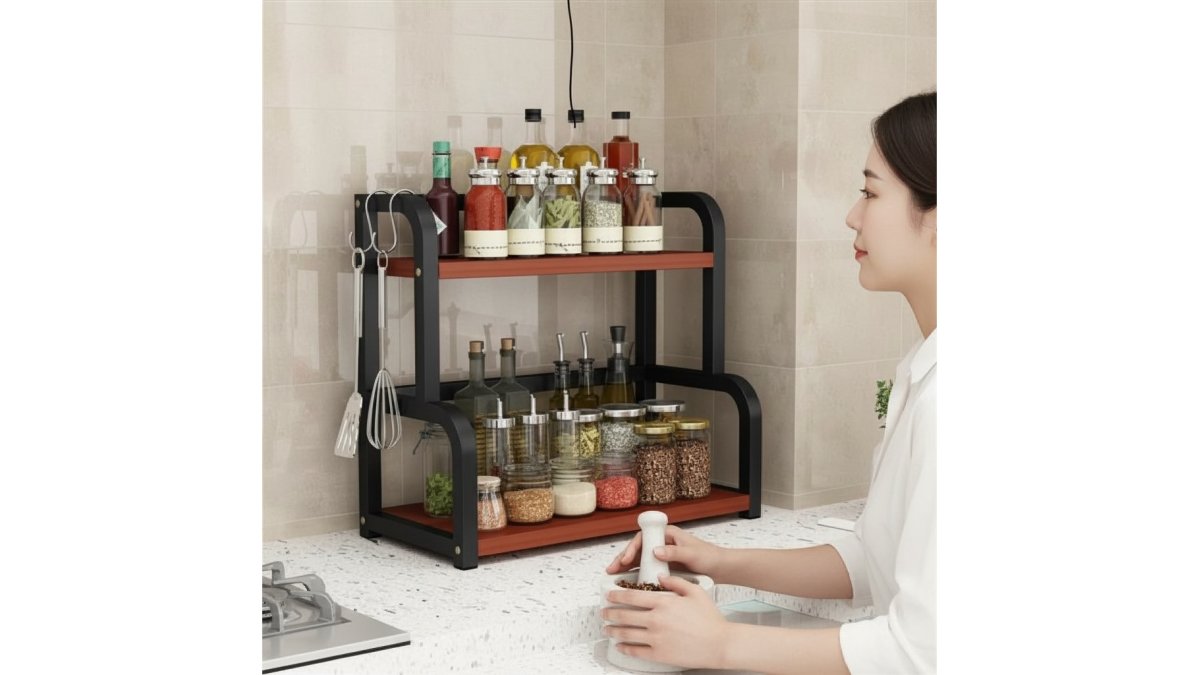
Vertical storage is the answer. A two-tier counter rack holds condiments and bottles in the same square footage as a single row, freeing the counter for actual prep work. Modern Goods Living carries a no-drill two-tier counter organizer that sits freestanding, so it works without touching your walls. It comes in 35 cm to 50 cm widths, with black or walnut-style boards.

Small Kitchen Storage Ideas That Work in Rentals
Small kitchen storage ideas that respect a lease come down to one rule: nothing permanent. Tension rods, over-the-door organizers, stackable bins, and magnetic strips all install without screws and leave no trace when you move out. Most guides assume you own the place and can drill into studs. If you rent, that assumption is the whole problem, a single anchor hole can cost you part of a security deposit, and many leases prohibit wall modifications outright.
The practical framework is to sort every fix into one of three mounting classes, then match the class to the surface and the load.
- Tension-based: tension rods inside cabinets for spray bottles, under-shelf baskets that grip the shelf above, and spring-loaded risers. Best for light-to-medium loads on stable, parallel surfaces. Avoid over glass shelves or thin particleboard that can bow.
- Adhesive and magnetic: removable adhesive hooks, magnetic strips on the fridge side for knives and spices, and adhesive caddies inside cabinet doors. Best for light loads. Adhesive strength drops sharply on textured, greasy, or freshly painted surfaces, so clean and degrease first, and test with a light item for a day before trusting it.
- Freestanding: utility carts, stackable bins, over-the-fridge racks, and floor racks that need no mounting at all. Best for heavy loads and the safest bet when your lease is strict or your walls are plaster.
A few renter-specific rules of thumb:
- Read the lease before you buy. Many agreements name adhesive strips and tension rods as permitted but ban screws, nails, and permanent shelf liners.
- Photograph the wall or cabinet before and after removal so you have a record if a landlord questions a mark.
- Keep the original packaging for anything you might return after a move.
- Prefer freestanding solutions for anything over a few pounds, a loaded tension rod can fail suddenly and take your dishes with it.
| Problem | Rental-Friendly Fix | Mounting Class | Where It Goes |
|---|---|---|---|
| Wasted cabinet depth | Pull-out sliding rack | Freestanding | Under sink, deep cabinets |
| Bare wall space | Tension rod or magnetic strip | Tension / adhesive | Backsplash, cabinet side |
| Cluttered countertop | Two-tier freestanding rack | Freestanding | Counter corner |
| Messy cutlery drawer | Expandable drawer divider | Freestanding | Any standard drawer |
| Floor overflow | Rolling multi-tier cart | Freestanding | Beside the fridge |
| Cabinet door interior | Over-the-door or adhesive caddy | Adhesive | Inside cabinet doors |
The Best Kitchen Organizers for Small Spaces
The best kitchen organizers for small spaces solve a specific problem rather than adding surface area to manage. Buy for the gap you actually have, not for the fantasy kitchen you wish you had.

Drawers are usually the first failure point. A fixed divider rarely matches an apartment drawer's odd width. An expandable bamboo cutlery organizer adjusts from 32 cm to 52 cm and holds up to 18 pieces across 8 compartments, so it fits the drawer instead of the other way around.
2-Tier Sliding Under-Sink Organizer →
Rental-Friendly Apartment Kitchen Organization: Non-Permanent Fixes
Apartment kitchen organization in a rental means every fix must be reversible. This is the angle most guides skip, and it's the one that matters if you're getting a deposit back.
Non-permanent solutions fall into three groups:
- Tension-based: tension rods inside cabinets for spray bottles, under-shelf baskets that grip the shelf above
- Adhesive and magnetic: magnetic strips on the fridge side for knives and spices, removable hooks rated for light loads
- Freestanding: utility carts, stackable bins, and floor racks that need no mounting at all
Ergonomics and Workflow in a Micro-Kitchen
Ergonomics in a micro-kitchen rarely get mentioned, yet they decide whether your kitchen feels functional or exhausting. In a space under about 30 square feet, you cannot fix a bad workflow with more bins, you have to fix the sequence of movement first. The goal is a work triangle: sink, stove, and fridge within a few steps of each other, with your most-used tools at waist height.
- Daily items go between hip and shoulder height, the easiest reach, no bending or stretching.
- Weekly items go high or low, where a small stretch or crouch is acceptable.
- Seasonal items go on the top shelf or in a bin you rarely open.
- Heavy items, like a stand mixer or a cast-iron pan, stay at waist height, never overhead.
- Keep the item you reach for most in the easiest spot, even if it breaks your old system.
- Group by task, not by type, coffee, tea, and mugs together; cutting board, knives, and oil together, so you make one trip instead of three.
- Leave one empty drawer as a landing zone for incoming mail and keys, so clutter never reaches the counter.
- Put a small prep bowl or compost bin within arm's reach of the cutting board to cut trips to the trash.
- Keep the most-used appliance on the counter and store the rest; a counter crowded with appliances shrinks your only prep surface.
Budget DIY vs. Premium Apartment Kitchen Organization
Budget DIY versus premium comes down to how long you plan to stay. If you're moving in a year, inexpensive stackable bins and tension rods do the job. If this is a longer-term home, spend on the pieces you touch daily: drawer dividers, under-sink pull-outs, and rolling racks.
Conclusion
The hardest part of a small kitchen isn't space, it's deciding what deserves a place in it. Once you've purged, measured, and chosen rental-friendly organizers, the room stops fighting you.
Frequently Asked Questions
What are the best vertical storage solutions for apartment kitchens?
Vertical storage works because most apartment kitchens have unused height above the counter and inside cabinets. A two-tier counter rack holds condiments and jars without spreading across the countertop, and a multi-layer rolling rack can hold produce or pantry goods in a narrow floor gap. Inside cabinets, stackable bins and shelf risers double the usable levels. The goal is to use height instead of floor or counter area, which keeps surfaces clear for actual cooking.
How do I organize kitchen cabinets with limited space?
Start by removing anything you have not used in six months, then group what remains by how often you reach for it. Daily items go at eye level and toward the front, while occasional items move to higher shelves. A 2-tier sliding under-sink organizer with pull-out drawers makes deep cabinets usable because you can reach the back without emptying the front. Expandable drawer dividers also keep utensils from turning into a pile, so you can find what you need on the first try.
What are common mistakes to avoid in small kitchen layouts?
The biggest mistake is buying organizers before you declutter, which just stores things you do not need. Another is stacking items so high that reaching the back requires unloading the front, which is why pull-out and sliding designs matter. Placing frequently used tools in hard-to-reach spots also slows down cooking. Finally, permanent installations like drilled shelves or adhesive strips can damage rental walls and cost you a security deposit, so choose freestanding or tension-based options instead.
How can I create more counter space in a tiny kitchen?
Move anything that lives on the counter but is not used daily. A no-drill two-tier rack consolidates condiments and bottles into one footprint, and under-cabinet hooks hold mugs, towels, and utensils off the surface. A rolling utility cart can serve as a movable prep station that tucks into a corner when you are done. Once the counter holds only what you use every day, you gain real workspace without renovating anything.
