
How to Maximize Vertical Storage Space
Table of Contents
- Why Vertical Storage Matters for Small Living Areas
- Wall-Mounted Storage Solutions That Work
- How to Install Floating Shelves Safely
- Stackable Bins and Under-Bed Storage
- Small Space Organization Hacks for Closets and Cabinets
- Vertical Storage for Specific Needs
- Common Mistakes to Avoid
- Frequently Asked Questions
Last Updated: September 23, 2026
Why Vertical Storage Matters for Small Living Areas
Most people approach small spaces wrong: they buy low furniture and hope clutter stays minimal. Then they run out of room anyway.
The solution: stop thinking horizontally and start thinking up. Maximizing vertical storage space reclaims square footage without shrinking your living area. A studio with wall-mounted shelves and stackable bins feels twice as spacious.
Small living areas demand intentional storage. According to the National Association of Home Builders, the average apartment size has shrunk, making efficient organization essential. Modern professionals, students, and anyone in compact housing need strategies that actually work, not just trendy organizing tips that look good for a week.
Modern Goods Living offers a curated selection of practical and stylish home and lifestyle products designed to enhance your daily routine. The difference is using every inch of wall space, stacking strategically, and choosing the right tools for your layout.
Wall-Mounted Storage Solutions That Work
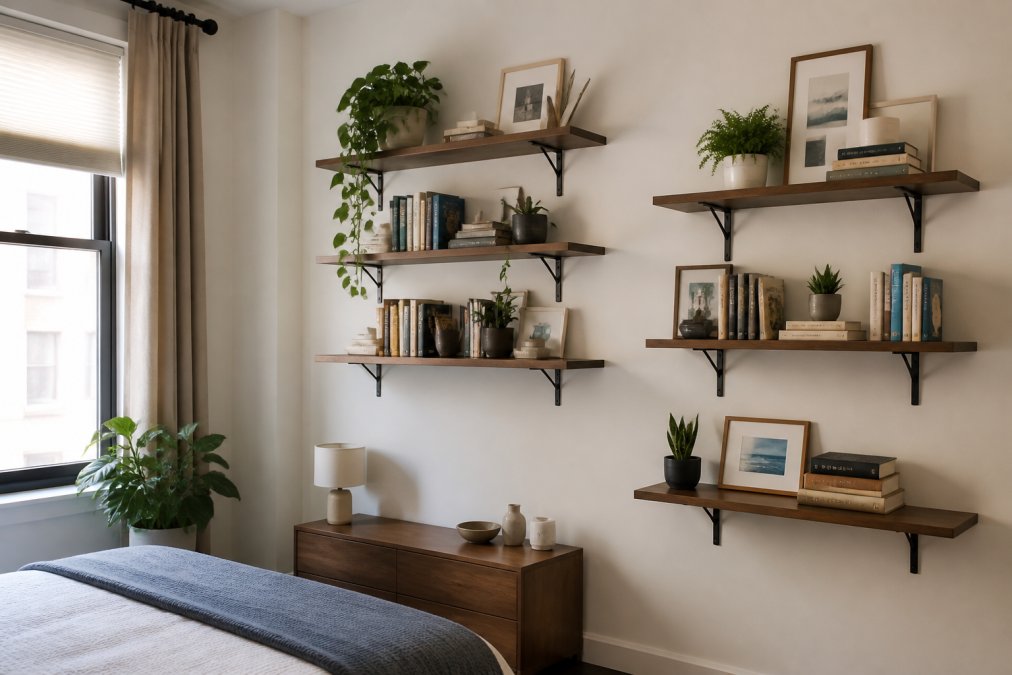
Wall-mounted shelving is the foundation of vertical storage. Unlike floor-standing furniture, wall shelves don't eat up walking space and make rooms feel bigger. But wall storage only works when installed correctly, most people skip the structural steps that prevent failure.
The key is understanding your wall type and choosing the right fastening method. Drywall, plaster, brick, and concrete each require different anchors. A shelf that works in one wall type will fail in another.
Understanding Wall Types and Load-Bearing Capacity
Not all walls are created equal. Before you mount anything, identify what's behind your drywall.
Drywall with wood studs (most common) can support heavy shelves if you anchor into studs, typically spaced 16 inches apart. Between studs, drywall alone supports only 5 to 10 pounds per fastener, far less than most shelves require.
Plaster walls (common in older homes) are harder and denser than drywall, supporting more weight per fastener. But they're brittle and prone to cracking if drilled incorrectly.
Concrete and masonry walls (basements, exterior walls, commercial spaces) are the strongest option. They support heavy shelves without studs, but fastening requires concrete anchors or masonry screws, not standard drywall anchors.
Use a stud finder to identify studs. Tap the wall, studs sound solid, hollow spaces sound empty. Mark stud locations with a pencil before drilling.
Pegboards and Hooks for Maximum Flexibility
Pegboards are the most adaptable wall storage option. Drill holes, insert pegs, and hang hooks, shelves, and baskets in any configuration. Rearrange anytime by moving pegs. Ideal for kitchen utensils, garage tools, craft supplies, and bathroom accessories.
Critical requirement: pegboards must mount into wall studs, not drywall anchors. A typical pegboard (24 by 48 inches) weighs 15 to 25 pounds empty; with tools and hooks, total weight reaches 50 to 100 pounds. This load must transfer into studs.
Mount pegboards using 2.5-inch wood screws driven into studs at the top, middle, and bottom. Space fasteners no more than 16 inches apart. Use washers under screw heads to prevent pulling through.
Pegboard hooks support 5 to 25 pounds each depending on type. Heavy items (power tools, cast iron) need 25+ pound hooks; lighter items use standard hooks.
Floating Shelves and Weight Distribution
Floating shelves look clean and modern. They appear to hover without visible brackets, creating a sleek aesthetic that works in any room. But floating shelves demand respect, they're only as strong as their mounting system.
A poorly installed floating shelf will sag, crack, or fail suddenly.
Installation Safety and Common Failures
Floating shelf failures occur for three reasons: (1) mounting to drywall without studs, fasteners pull through over time; (2) undersized fasteners, drywall anchors or short screws fail under vibration; (3) uneven weight distribution, overloading one side creates a lever effect that stresses brackets.
How to Install Floating Shelves Safely
Installing floating shelves correctly takes patience. Rushing leads to mistakes. Take your time, and your shelves will last for years.
Extendable Stainless Steel Under-Sink →
Finding Studs and Checking Load Capacity
Wall studs are the wooden frames behind drywall and the only part strong enough to hold heavy shelves long-term. Use a stud finder (under $20) to locate studs, mark them with a pencil, and attach brackets directly to studs, never to drywall alone.
Step-by-Step Installation Process
Step 1: Gather tools (drill, level, stud finder, brackets, screws, shelf). Step 2: Mark studs with a stud finder and pencil. Step 3: Position brackets at desired height using a level. Step 4: Drill pilot holes slightly smaller than your screws. Step 5: Screw brackets into studs firmly without over-tightening. Step 6: Slide shelf onto brackets, ensure it's level, and test stability.
| Installation Step | Key Focus | Common Mistake |
|---|---|---|
| Finding studs | Locate solid wall support | Mounting to drywall only |
| Positioning brackets | Use a level for alignment | Skipping the level check |
| Drilling holes | Match screw size | Using wrong drill bit size |
| Attaching brackets | Screw into studs, not drywall | Partial stud contact |
| Loading shelf | Respect weight limits | Exceeding manufacturer capacity |
Stackable Bins and Under-Bed Storage
Stackable containers multiply storage instantly and work in closets, under sinks, on shelves, and under beds. Choose clear bins and label by category (seasonal clothes, holiday décor, winter gear, office supplies) to save time hunting for items.
Small Space Organization Hacks for Closets and Cabinets
Closets and cabinets are prime real estate for vertical storage. Most people use only half the available space.
Closet Rod Doubling and Tension Rod Layering
Standard closet rods hold clothes at one height. Install a second rod 3 to 4 feet below the first for shorter items (folded pants, shirts, jackets). Longer items (dresses, coats) stay on top. This nearly doubles closet capacity.
Over-the-Door Organizers and Cabinet Optimization
Over-the-door organizers add storage without taking wall space. The Over-the-Door Pantry Organizer Rack from Modern Goods Living mounts in seconds with adjustable baskets for items of different heights. Its heavy-duty steel frame holds up to 26.5 pounds. At $59.99, it's rental-friendly and adds serious storage without drilling.

Vertical Storage for Specific Needs
Different living situations demand different storage approaches. Homeowners can drill and install permanent shelving; renters cannot. Mobility limitations require accessible heights; families with children need safety-conscious solutions.
Rental-Friendly Vertical Storage Options
Renters cannot drill holes, mount shelves, or make permanent modifications. Your lease prohibits it and your security deposit depends on returning the space in original condition. But you can choose non-permanent solutions.
Trade-Offs: Renter Solutions vs. Permanent Shelving
Rental-friendly storage offers flexibility and portability but has limits:
| Solution Type | Weight Capacity | Permanence | Cost | Setup Time |
|---|---|---|---|---|
| Tension rods | 20-50 lbs | Temporary | $15-40 | 5 min |
| Adhesive hooks | 1-16 lbs | Temporary | $5-20 | 2 min |
| Freestanding shelves | 100-300 lbs/shelf | Portable | $50-300 | 30 min |
| Over-the-door organizers | 10-30 lbs | Temporary | $20-60 | 5 min |
| Hanging closet systems | 20-50 lbs | Temporary | $30-100 | 15 min |
| Under-bed containers | 50-100 lbs | Portable | $20-80 | 10 min |
Permanent wall-mounted shelves support more weight and look more polished, but you cannot take them when you move. Renter-friendly solutions are lighter-duty but portable and leave no damage.
Kitchen and Pantry Organization
Kitchens benefit most from vertical thinking. Wall-mounted racks and shelves keep frequently used items accessible without eating counter space. For renters, use over-the-door organizers, freestanding shelves, tension rods inside cabinets, and adhesive hooks. For homeowners, wall-mounted shelves above the sink or stove, spice racks, and wall hooks keep essentials within reach while keeping counters clear.
Vertical Storage for Accessibility and Mobility Limitations
Seniors, people with arthritis, and those with mobility limitations need vertical storage designed for accessibility.
Common Mistakes to Avoid
Small storage mistakes compound quickly. Ignoring weight limits causes shelf failure and safety hazards. Mounting to drywall alone fails, use studs for heavy shelves. Overcrowding shelves looks chaotic; leave breathing room. Choosing wrong organizers wastes money; measure before buying. Neglecting accessibility makes items hard to reach; put essentials at eye level. Forgetting aesthetics makes storage look cluttered; use matching bins and arrange by color or category.
Frequently Asked Questions
What are the best wall-mounted storage solutions for small apartments?
Wall-mounted shelves, pegboards, and floating shelves are ideal for small apartments because they use vertical space without consuming floor area. Floating shelves work well for displaying items and keeping frequently used objects accessible. Pegboards offer flexibility, you can rearrange hooks and baskets as your needs change. Over-the-door organizers add storage without wall installation. Choose options that match your apartment's aesthetic and weight capacity. Modern Goods Living's hanging storage organizers provide a portable alternative that doesn't require wall mounting.
How much weight can floating shelves actually hold?
Floating shelf weight capacity depends on the bracket quality and wall type. Standard shelves mounted into studs typically hold 25-50 pounds per shelf. Drywall anchors alone support far less, usually 10-15 pounds. Always locate studs before installation and use brackets rated for your intended load. Check the manufacturer's specifications for your specific shelf system. When in doubt, distribute weight across multiple shelves rather than loading one heavily. Proper installation into studs ensures safety and prevents sagging or wall damage.
What's the difference between DIY vertical storage and custom built-ins?
DIY vertical storage uses off-the-shelf products like shelves, bins, and organizers you install yourself, it's affordable, flexible, and rental-friendly. Custom built-ins are permanently installed solutions designed specifically for your space, offering better aesthetics and maximum storage efficiency but requiring professional installation and higher upfront costs. For renters or those uncertain about long-term living situations, DIY solutions like stackable bins and wall-mounted racks provide the flexibility to adapt without losing your security deposit. Homeowners planning to stay long-term may find custom solutions more worthwhile.
Can I use vertical storage solutions in a rental apartment?
Yes, many vertical storage options work in rentals. Avoid permanent wall damage by using tension rods, over-the-door organizers, and freestanding stackable units instead of drilling into walls. Adhesive hooks and damage-free hanging systems let you add storage without holes. The Foldable Hanging Storage Organizer from Modern Goods Living is ideal for renters, it hangs from existing rods or hooks and collapses when you move. Always check your lease before installing anything, and choose solutions you can remove without leaving marks.
